

Design your first 3D printable model (beginner CAD tutorial)
From an empty workplane to a file your printer can print: a 60 × 40 mm tag with a hole and rounded edges.
In the program, this lesson runs in a practice workspace beside your own design and checks each step as you go.
What you will make
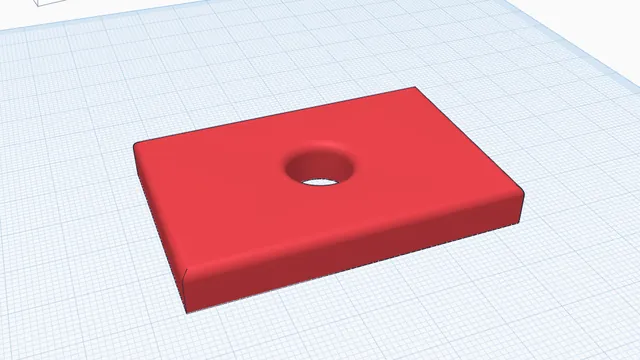
A tag 60 × 40 × 8 mm, with a 12 mm hole and rounded top edges, saved as an STL.
What you will learn
- Find your way round the 3D view
- Put shapes down and give them exact sizes
- Line parts up with Align
- Cut a hole with Hole and Group
- Round edges with Fillet
- Check a size with Measure
- Export a file for your slicer
Step by step
Look around
This big grid is the workplane: think of it as your printer's bed. Hold the right mouse button and drag on it to look round, then scroll to zoom in and out.
You will often need to see a part from the side or from below. Nothing you do with the camera changes your design.
You should see: The view turns or zooms.
Tip: On a touch screen: drag with one finger to look round, pinch to zoom. Lost? The house button on the left brings the view back.
Put down a box
On the right are the shapes. Drag the Box onto the workplane (or click it, then click the workplane).
Almost everything is made from simple shapes like this, joined together and cut away.
You should see: A box on the workplane, with white squares round it (it is selected).
Give it an exact size
Click the box to select it. In the panel on the right, double-click the number next to Length, type 60 and press Enter. Do the same for Width (40) and Height (8).
Typed sizes are exact to the hundredth of a millimetre: what you type is what prints.
You should see: A flat slab, 60 × 40 × 8 mm.
Tip: Dragging along a size bar changes it by eye; double-clicking its number lets you type it exactly. You can also drag the white squares on the box. All sizes are in millimetres.
Add a cylinder
Drag a Cylinder onto the workplane beside the slab. Then make it thinner: double-click its Length and Width numbers and type 12 in each.
This cylinder will become the hole for a key ring or a bag strap.
You should see: A cylinder 12 mm across, standing next to the slab.
Line them up
Select both parts: click the slab, then hold Shift and click the cylinder. Press Align (or L), then click the middle dot along the length and the middle dot along the width.
Align puts parts exactly in line, with no fiddly dragging: the hole will sit dead centre.
You should see: The cylinder stands in the middle of the slab and goes right through it.
Tip: The black dots appear round the selection. Hover one to see where the parts would go, click to do it. Press Esc to put Align away. If the cylinder sits on top of the slab, select it and press D to drop it onto the workplane.
Make it a hole
Click just the cylinder, then press Hole at the top of the panel (or press H).
Any shape can be a hole. A hole cuts its shape out of the solid parts it is grouped with.
You should see: The cylinder turns see-through and striped: it is a hole now.
Cut the hole
Select both parts again (drag a box round them, or Ctrl+A) and press Group (Ctrl+G).
Grouping joins solids and cuts the holes out of them. The parts are remembered, so you can still change the hole later.
You should see: One part: a slab with a round hole through it.
Round the top edges
With the tag selected, press Fillet. Click the top face of the tag: every edge round it is picked, the hole's too. Set the size to 2 mm and press Apply.
Rounded edges feel better in the hand, are stronger and print cleaner than sharp ones.
You should see: The top edges and the hole's rim are smoothly rounded.
Tip: You can also click single edges. The preview shows the rounding before you apply it. Nothing changes until you press Apply.
Check the hole
Press Measure (Shift+R) and click the inside wall of the hole. The card shows its diameter.
Measure tells you the real size of any face, hole or gap, so you can check a part before you print it.
You should see: The card says Hole Ø 12.00 mm.
Tip: Zoom in on the hole first (scroll over it). Click the wall itself, not the rounded rim.
Export it for printing
Press Export at the top and, on the STL line, press Everything. Save the file, then open it in your slicer (Bambu Studio, PrusaSlicer, Cura…) and print it.
STL is the file every slicer reads. Every export is checked first, so the slicer gets one closed, watertight solid.
You should see: Your STL file is saved.
Tip: 3MF works too, and keeps colours and part names. The green Print button sends the design straight to your slicer, with no file to find.
Tools used
CameraAdding shapesMove, size & liftAlignSolid & HoleGroupFillet & chamferMeasureExport for printing
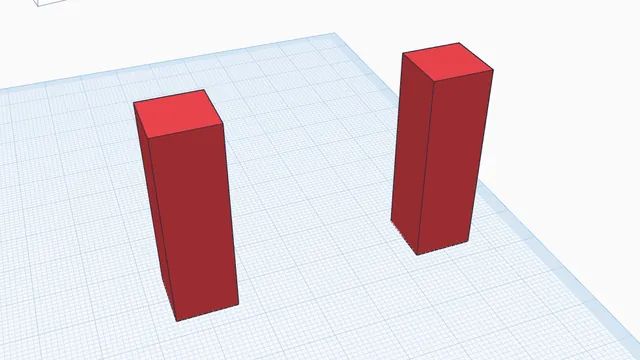 Move, turn and size by handBeginner · 5 min · Drag parts into place, lift them, turn them by exact steps, put them back down and copy them.