

How to make holes, pockets and trays in a 3D design
Use hole shapes to hollow out a tray with a floor, and Intersect to keep only where two parts overlap.
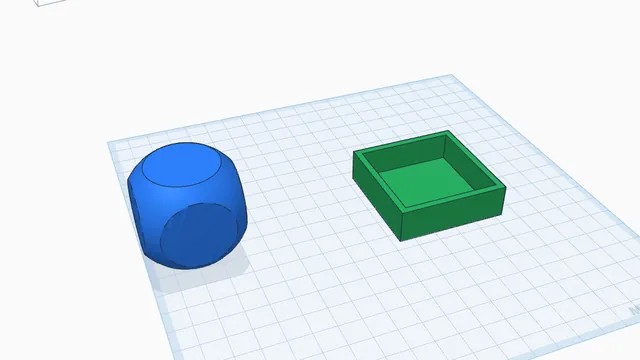
In the program, this lesson runs in a practice workspace beside your own design and checks each step as you go.
What you will make
A 50 × 50 mm tray with 3 mm walls and a 2 mm floor.
What you will learn
- Use a box as a hole
- Leave a floor by lifting the hole
- Group to cut
- Intersect to keep only the overlap
Step by step
Add a box hole
Drag a Box hole (the striped one) onto the workplane next to the tray, and size it 44 × 44 × 20 mm.
A hole the size of the inside of the tray: 50 − 2 × 3 mm walls = 44 mm.
You should see: A striped box, 44 × 44 × 20 mm.
Leave a floor
Centre the hole on the tray (select both, Align the middles), then lift the hole 2 mm off the workplane: type 2 in its height above the workplane, or drag the black cone.
Whatever the hole covers is cut away. Lifted 2 mm, it leaves a 2 mm floor.
You should see: The hole sits in the middle of the tray, 2 mm up.
Tip: The panel shows the selected part's position: the height box sets how far its bottom is above the workplane.
Cut it
Select both and press Group.
The hole is cut out of the tray, leaving 3 mm walls and a 2 mm floor.
You should see: An open tray.
Keep the overlap
Now something different. Drag a Sphere onto the workplane and make it 50 × 50 × 50, then put a Box of 40 × 40 × 40 in the same place (Align the middles). Select both and press Intersect.
Intersect keeps only where the parts overlap: here, a cube with rounded corners.
You should see: A rounded cube.
Tip: Intersect is in the Combine group (or » More). It needs the two parts overlapping.
 Copies, repeats and patternsBeginner · 5 min · Make evenly spaced copies with Ctrl+D repeat, and mirror a part to the other side.