

Trace a picture at its real size into a 3D part
Put a drawing on the workplane, set its real size from a known length, and trace it into a part.
In the program, this lesson runs in a practice workspace beside your own design and checks each step as you go.
What you will make
A part traced from a drawing, at the drawing's real size.
What you will learn
- Insert a picture as a canvas
- Set its scale from a known length
- Trace it in a sketch
Step by step
Insert a picture
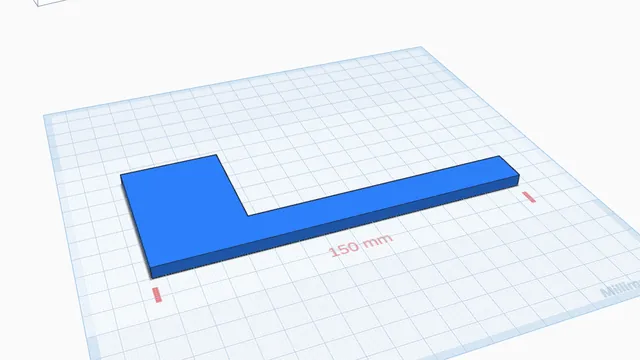
Press Canvas and insert an image, or press Show me for a sample drawing of a bracket.
You should see: The picture lies on the workplane.
Set its size
Press Set scale, click the two red marks on the drawing, and type 150 mm.
Once one length is right, the whole picture is at its real size.
You should see: The picture changes size.
Trace it
Press Trace in sketch, draw over the outline (rectangles and lines), then press Done.
You should see: A part sits exactly over the drawing.
 Get a design ready to printBeginner · 4 min · Turn parts onto their best flat faces, check for overhangs that need support, and export a 3MF.